Showing posts with label vegan. Show all posts

Friday, May 31, 2013

Sweet Potato Sweetie Packs (for campfire, grill, or oven)


I love sweet potatoes. They are, hands down, one of my most favorite foods. I will even eat them for breakfast. I could go on Bubba-style (think Forrest Gump) about the many ways I eat them, but I'll spare you!

Last week I was considering food my three year old would likely eat for our camping trip and arrived at an old favorite: grilled ham steak, pineapples, and yams. My grocery store doesn't sell a lot of canned vegetables, which overall is a good thing, but annoying when you want canned yams. Then I remembered that I had two large sweet potatoes in the pantry and also remembered how good my last batch of grilled sweet potatoes was... this would mean that I would not have to go to a second grocery score... score!

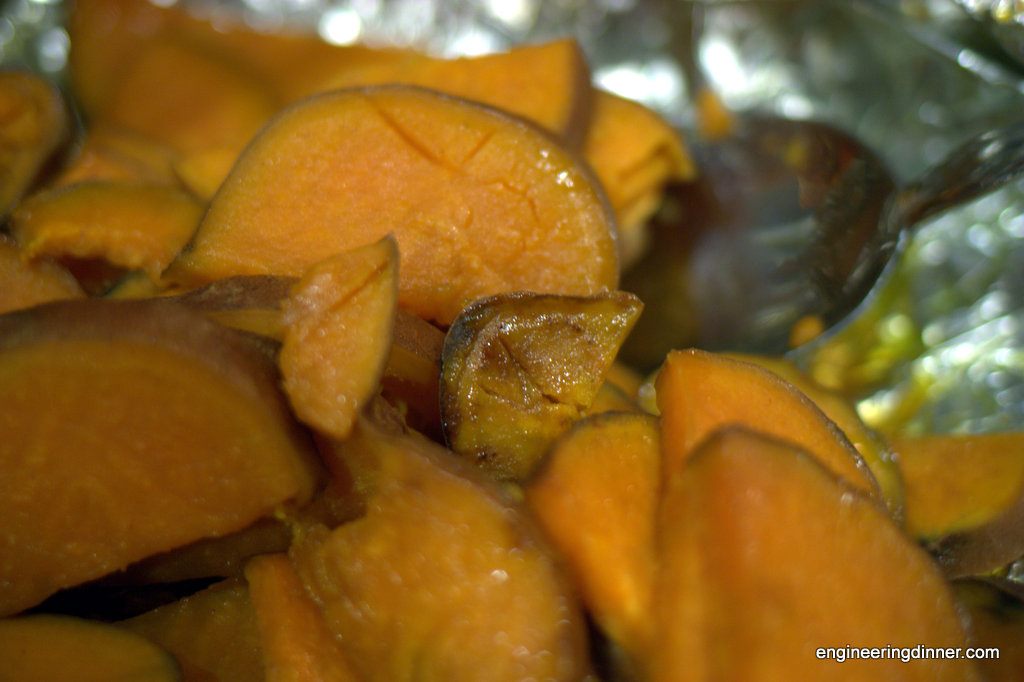
I used the same method as before and they tasted AMAZING! They work on the campfire, grill, or in the oven. When we camp I prepare the pack before we leave and put it in a gallon zip bag in the cooler; that way all I have to do is throw it on the coals.


Sweet Potato Sweetie Packs
  • sweet potatoes, sliced (however many you need for your group) - I used two HUGE ones
  • butter (I use Earth Balance spread) - I used about 2 Tbsp.
  • honey (coconut palm sugar or sweetener of choice if vegan) - I used about 1 Tbsp.
  • cinnamon - I used about 1/2 tsp.
  • heavy duty aluminum foil (don't even think about skimping on this!)
  1. Set out a large piece of heavy duty aluminum foil. For two huge sweet potatoes I used a piece that was about 2' long. I also use the wider (18") heavy duty aluminum foil for foil packets.
  2. Smear butter on the aluminum foil, where the potatoes will go.
  3. Place half the potatoes on the foil. Drizzle honey over potatoes, scatter a few pats of butter, and shake on some cinnamon.
  4. Add the remaining potatoes on top.
  5. Gather the long sides of the foil and roll to close. Roll in each short side to form a packet. If I'm camping I put this packet in another sheet of foil to create a second packet around the first.
  6. Cook and enjoy!
    • Campfire: Cook right on top of hot coals for about 40 minutes, flipping and turning about every 10 minutes.
    • Grill: Grill over hot, indirect heat for about 25 minutes.
    • Oven: I've never done it, but I would cook it in a 400°F oven for about 30 minutes.

Mmmm... butter AND honey AND cinnamon!

On the grill (along with a chicken)!

Yummy perfection!

This recipe has been shared on Diet, Dessert, and Dogs' Wellness Weekend, Vegetarian Mamma's Gluten Free Fridays, and Allergy Free Alaska's Whole Food Fridays.

Thursday, May 2, 2013

Swimming Update and Chard (or Kale) with Dates


I have to admit that I'm very proud of myself because I swam at least two times every week for the month of April. This is the best I've ever done with exercising and there are two reasons for my success: (1) I don't hate swimming so its not too much of a chore; (2) I'm trying to be a good role model for my son and show that regular exercise is just something we should incorporate into our lives. Clearly the latter reason is the most important and the one that really keeps my motivated to get up at 5 AM and get in the pool!

I'm definitely getting stronger and gaining stamina. I'm swimming about a 1/2 mile in 30 minutes. My abs, inner thighs, and arms are getting stronger. I just feel all around better. So, yay me!


Chard (or Kale) with Dates
  • 1 tsp olive oil
  • 1 shallot, chopped
  • 1 bunch chard or kale, washed, de-stemmed, and roughly chopped (I prefer chard)
  • 4 dates, chopped
  • salt and pepper
  1. Heat olive oil in a skillet. I use a 12" skillet.
  2. Sauté shallot until translucent.
  3. Add chard or kale and stir occasionally until beginning to wilt.
  4. Add in dates and stir occasionally until the greens have wilted.
  5. Finish with salt and pepper, as needed.


This recipe has been shared on Vegetarian Mamma's Gluten Free Fridays, Diet, Dessert and Dogs' Wellness Weekend, and Allergy Free Alaska's Whole Food Fridays.

Thursday, April 18, 2013

Mister Rogers and Broccoli Apple Slaw


Between Boston and West, Texas there have been a lot of prayers lifted to those in need. There have been a lot of positive things said on social media, many accredited to Mister Rogers.  The quote I've seen the most is, "When I was a boy and would see scary things on the news, my mother would say to me, 'Look for the helpers. You will always find people who are helping.'" I find it interesting that, even after his death, Mister Rogers can help children and adults alike deal with our feelings. I'm glad to part of the Mister Rogers generation.

***

This recipe was inspired by a kohlrabi-apple slaw in Nourishing Meals. My grocery store did not have kohlrabi, so I used broccoli. I've changed the flavor profile of the dressing to accommodate the broccoli and dried cranberries.


Broccoli Apple Slaw
This holds for a few days in the refrigerator.
  • 2 crowns broccoli, cut into small pieces (I do this ahead of time)
  • 2 apples, cut into small pieces (I like Fiji)
  • ~1/4 c dried cranberries
Dressing (can be made ahead of time)
  • 6 oz plain yogurt (any type - I use goat)
  • 1 tbsp honey (or agave if vegan)
  • 1 tbsp apple cider vinegar
  • 1 tsp orange juice
  • 1/4 tsp ground ginger
  • 1/4 tsp salt
  1. In a small bowl, mix together all of the dressing ingredients. Set aside.
  2. Place broccoli, apples, and dried cranberries in a bowl.
  3. Pour dressing over slaw and stir. It's best if you let it sit for at least 10 minutes before serving.

This recipe has been shared on Diet, Dessert and Dogs' Wellness Weekend, Vegetarian Mamma's Gluten Free Fridays, Allergy Free Alaska's Whole Food Fridays, and The Daily Dietribe's 5-Ingredient Mondays.

Wednesday, April 10, 2013

Happy Half Blog-Birthday and Make-ahead Layered Salad


I made my first Engineering Dinner post 6 months ago today! There have been 43 posts since then and over 5,000 page views. True to the blog name, I've shared mostly dinners but there have been two desserts and a smoothie. And, like most bloggers, my most popular post has been a dessert.

My uncle has always brought his Farmer's Salad to family dinners. It's delicious, but I never knew how easy it was until this past Christmas when I made it myself. You layer all these ingredients together the night before and let them meld into a fantastically flavored salad. I've made it for several get-togethers since then and recently realized that there's no reason why this has to be reserved for special events. What's better than a salad that you just have to toss when you get home?

So my description thus far may have cued a memory of a mayonnaise-y salad you've had in your past. Yes, there's mayonnaise in this, and yes, it's a fair amount. If you dislike mayonnaise all I can offer is that I've served this to several professed mayonnaise haters (my husband included) and they've all enjoyed the salad. I think that mayonnaise selection is key here. In my experience, the Spectrum Organics brand Olive Oil mayo is the key to enjoyment for non-mayo eaters.


Straying from tradition, I have engineered the flavors a little bit for this version, and the possibilities for other flavor options are endless. It's also a great way to use leftovers, as I did with the chicken! It will keep for lunch the next day, but not much further.


Make-ahead Layered Salad
Serves 4+
All measurements are approximate and some depend on the diameter of your bowl.
  • 1 head romaine lettuce, cut and washed
  • 1/2 lb spinach, torn into bite-sized amounts
  • 2 stalks celery, diced
  • 1/2 c frozen peas (do not defrost)
  • 4 slices bacon, cooked and chopped (omit if vegan, or substitute another protein)
  • ~1/3 c cooked chicken, chopped (omit if vegan, or substitute another protein)
  • ~1/4 c craisins
  • ~3/4 c cheese, shredded (I used goat gouda, but any kind will work)
  • ~1/2 c mayo (vegannaise or another substitute is acceptable)
  • ~1/4 c mustard (I used a stone ground dijon, but honey mustard would be excellent)
  1. Place lettuce and spinach in the bottom of a large bowl. (I used my large mixing bowl.) You may need to press down gently to compress them.
  2. Sprinkle celery over lettuce layer.
  3. Sprinkle peas over celery.
  4. Sprinkle bacon and chicken over peas, if using.
  5. Sprinkle craisins over meat.
  6. Sprinkle cheese over craisins. You want to cover the surface with cheese.
  7. Mix the mayo and mustard together in a bowl. Spread over cheese to completely cover all the way to the bowl. It's critical that this mixture covers everything to seal out air and moisture. Cover bowl and place in fridge overnight.
  8. Next day: I like to pull it out of the fridge about 30 minutes before I plan to serve it. Toss completely and serve.
Lettuce, spinach, celery, and peas
Added meats and craisins
Seal out moisture and air... seal in flavor!
Yum!
This recipe has been shared on Diet, Dessert and Dogs' Wellness Weekend, Vegetarian Mamma's Gluten Free Fridays, and Allergy Free Alaska's Whole Food Fridays.

Thursday, April 4, 2013

Swimming, Magical Music, and Mashed Sweet Potatoes and Cauliflower


I know this is a bizarre title but it's what I'm thinking about. Please excuse the lack of segues.

****

As an update to last week's post, I have joined the YMCA! On Wednesday morning I got up at 5AM and was in the pool swimming laps at 5:30AM. It felt great! I'm planning on doing it again tomorrow morning.

****

Does anyone remember the song from the 80s called "We Belong"? It was performed by Pat Benatar, but written by one of my favorite groups, Lowen and Navarro. I bought their Broken Moon album after hearing them on NPR. I went to see them in concert a few times and purchased a few more albums. When my son was a few months old Lowen and Navarro's music became magical for our family as it would calm our fussy infant and get him to fall asleep. All of you former or currently sleep-deprived parents out there can certainly agree that this would be magical! My son continued to fall asleep to Lowen and Navarro until last year when he discovered Adele and Robbie Schaeffer, of Eddie From Ohio. His favorite music to fall asleep to now is Robbie Schaeffer's La La Love, which is an awesome song for a good cause, an organization called One Voice.

Getting back to Lowen and Navarro, they have some absolutely beautiful songs. One of my favorites is Crossing Over, from their album Pendulum. My favorite album is Live Radio, which is acoustic versions of some of their songs. Unfortunately, Eric Lowen passed away last year from ALS, but Dan Navarro is still performing. Their final album, Learning to Fall, is particularly poignant.

****

This recipe is something I threw together because my grocery store was lacking most of the veggies I was looking for, such as squash, parsnips, and turnips. So, I decided to try cauliflower because I'm starting to like it now that I know it's good roasted. It was a hit, even with the almost-3-year-old. And, it was easy! Who doesn't like that?


Mashed Sweet Potatoes and Cauliflower
The cauliflower can be cut and washed the night before. The sweet potato can be peeled, cut, and stored in water until ready to use.

  • 2-3 sweet potatoes, cut into 1/2"-3/4" cubes
  • cauliflower, 1/2 head, cut into florets
  • salt and pepper
  • nutmeg
  1. Cook sweet potatoes and cauliflower together. I pressure cook them for 4 minutes with 1/2 cup of water. Boiling or steaming would also work. Depending on your cooking method, you may need to drain cooking water.
  2. Mash them and season with salt, pepper, and nutmeg to taste. They will be somewhat lumpy.


This recipe has been shared on Diet, Dessert and Dogs' Wellness Weekend, Vegetarian Mamma's Gluten Free Fridays, Allergy Free Alaska's Whole Food Fridays, and The Daily Dietribe's 5-Ingredient Mondays.

Thursday, February 14, 2013

Engineering Dessert: Nut Butterfingers

Reminder: Find my on Twitter (@EngDinner), Facebook (EngineeringDinner), and Pinterest (Engineering Dinner)

One of the best things about being an adult involved in Girl Scouts is that you meet some wonderful women! And, they span the decades in age and all bring various backgrounds and interests to the group. Amazing!

There's one woman in particular who is such a sweetheart and bleeds Girl Scout green! She used to volunteer as a Service Unit Manager, which is a person who oversees anywhere from 20 to 35 troops. She now is a paid Girl Scout employee. Anyway, we were at a meeting planning events for multiple service units and she brought the most amazing snack I had ever had (okay so I was pregnant at the time!) They were a peanut butter and oatmeal bar cookie base with chocolate and peanut butter on top. I immediately asked her for the recipe. The next time I saw her, not only did she have the recipe, but she had made a batch just for me! And, she was sharing a recipe that had been her mother's. The woman was probably around 60, so this is definitely a well-loved, tried-and-true recipe!

I've made them many times but have only dreamt about them since becoming gluten free. But in my desire to create another dessert for the blog I decided to try tackling them based on my current food philosophy. I was pretty close on the first try, the second try was even better, and now I'm declaring them just as amazing as the gluten-full, grain-full, refined-sugar-full, dairy-full version! (And, just for kicks, I omitted the egg.) I hope you enjoy them as much as I do!


Nut Butterfingers
The original recipe was called Peanut Butterfingers. My son is allergic to peanuts, and while he doesn't care for sweets, he does like to help me bake, so I use almond butter if he's helping. My husband actually prefers the almond version to the peanut version, but he's not a peanut butter and chocolate fiend. By the way, this makes a lovely half recipe in an 8"x8" pan.

Cookie Bar Base
  • 1/4 c Earth Balance
  • 1/2 c coconut palm sugar
  • 5 drops stevia (I used vanilla flavored)
  • 1 flax egg (1 Tbsp ground flax mixed with 3 Tbsp boiling water, let sit for 15 minutes)
  • 1/3 c nut butter (I've tried almond and peanut so far)
  • 1/4 c applesauce
  • 1/4 tsp salt
  • 1/2 tsp baking powder (watch out for corn starch if avoiding grains!)
  • 1 tsp vanilla extract
  • 1/2 c almond flour
  • 1/2 c chickpea flour
  • 1 c quinoa flakes

Topping
  • 6 oz chocolate chips (semi-sweet)
  • 1/2 c powdered sugar (can make your own using unrefined sugar)
  • 1/4 c nut butter
  • 2-4 Tbsp milk (I used almond)

  1. Preheat the over to 350°F. Grease a 13"x9" baking pan (I used glass.)
  2. In a mixer, cream together the butter, sugar, and stevia.
  3. Blend in the egg, nut butter, applesauce, salt, baking powder, and vanilla.
  4. Stir in the almond flour, chickpea flour, and quinoa flakes.
  5. Spread into the prepared pan and bake for 25 to 30 minutes.
  6. Sprinkle the chocolate chips on top as soon as it comes out of the oven. Let stand for 5 minutes to melt.
  7. Meanwhile, in a small bowl, stir together the powdered sugar, nut butter, and milk until smooth.
  8. Spread the melted chocolate chips evenly over cookie bar base.
  9. Drizzle the nut butter over the melted chocolate and pull a spatula through to mix the two toppings.


This recipe has been shared on Diet, Dessert and Dogs' Wellness Weekend, Vegetarian Mamma's Gluten Free Fridays, Allergy Free Alaska's Whole Food Fridays, and Simply Sugar and Gluten Free's Slightly Indulgent Tuesday.


Thursday, January 31, 2013

Blogging Thoughts and Potato Salad

I've now been blogging for 3.5 months and I'm thoroughly enjoying it! I've been working on my photography and feel I'm improving (disclaimer: pictures on this post were taken a while ago!) As part of improving my photography, I was shopping with my mother and picked up a variety of plates and textured backgrounds. My <unbiased> mother informed me that she thought my photos were fine, but I thought they needed improvement in order to make a successful blog. Then she asked why I needed a successful blog. Wow! What a question! Umm... I guess because I'm passionate about food and cooking and would like to share with others. (Eventually, a cookbook deal or sponsorship would be nice, too.)

My current food philosophy has changed my life dramatically. I used to have stiff joints every morning. Now stiff joints are a rare occurrence. It's amazing to me that a change so simple as the food you eat can make such a dramatic difference in your life. But, I guess that's why they say you are what you eat.

So, what am I getting out of this blog? My writing has improved. I'm beating the stereotype about engineers and writing! Maybe all engineers should blog...

I'm also pretty excited about having had almost 2,500 hits (granted, over 500 are from this post.)

What does the future hold? More posts, more recipes, more gadget reviews, more menus, and more Engineering Desserts. I've also started a Facebook page and Twitter account. (Links to like/follow are on the right.)

Today I'm sharing my potato salad recipe. My mom used to make a potato salad that marinated in a vinaigrette first and then the mayo was added. We would sneak pieces of potato before she put the mayo in, so she stopped adding the mayo altogether! There are a variety of ways to make it by changing the vinaigrette, but this version is my favorite.


Potato Salad
Serves 4

  • 4 to 6 large new potatoes (or other type)
  • 3 Tbsp extra virgin olive oil
  • 2 Tbsp brown rice vinegar
  • 2 tsp mustard
  • 1/2 tsp maple syrup
  • 1/4 tsp sage
  • salt and pepper to taste
  1. Slice potatoes into bite sizes pieces. I will typically cut into quarters lengthwise and then 1/4" slices.
  2. Cook potatoes in boiling water until easily pierced with a fork. Alternately, cook potatoes in a pressure cooker. It takes about 3 minutes in mine at 10 psi.
  3. While the potatoes are cooking, mix the remaining ingredients together to form a vinaigrette. I use a jar so I can shake it, but a bowl and whisk work, too.
  4. Drain potatoes in a colander.
  5. Transfer potatoes to a bowl and stir in vinaigrette while the potatoes are still warm. You won't necessarily need all the vinaigrette, based on the number of potatoes.
  6. Serve warm, room temperature, or cold.
Note: The potatoes can be cut the night before. Place sliced potatoes in a container and fill with water to cover the potatoes. Store in the refrigerator. Drain and cook. The vinaigrette can also be made the night before, just bring to room temperature and give it a good shake before dressing the potatoes.


This recipe has been shared on Diet, Dessert and Dogs' Wellness Weekend, and Vegetarian Mamma's Gluten Free Fridays.

Thursday, January 10, 2013

Engineering Dessert: 5 Minute Chocolate Chip Cookie (grain free)

So, a few weeks ago a friend of mine pinned this:


I wanted one. Immediately. I don't usually like chocolate chip cookies. It must have been one of those days!

The referenced blog no longer works, but someone had been nice enough to include the original recipe in the pin comment. On a whim, I made the recipe, switching almond flour for the all purpose. The result: decent, but WAY too sweet for my refined-sugar-free taste buds. Also, it's a bit annoying to have to separate an egg for such an otherwise simple recipe, and then you're stuck with an egg white.

Since then, I've been playing around with the recipe. Let me tell you, this has been hard work! It's rough having to eat a warm chocolate chip cookie every night in the name of science...

I finally got it to a place where I thought it tasted good, so I tried a shortcut. I still liked it, but my husband declared it "grainy". YIKES! That's no good! So, I tweaked it a little more, but have determined that the short cut just won't work. It can still be made in about 5 minutes, so the shortcut was a bit uncalled for.

And now I present Happiness in Five Minutes!

5 Minute Chocolate Chip Cookie
Serves 1
  • 1/2 tbsp butter (I use Earth Balance Buttery Spread)
  • 1 tbsp coconut palm sugar
  • 5 drops vanilla stevia
  • 1/4 tsp baking soda
  • 1/4 c (or 4 tbsp if you don't like creating excess dishes) almond flour
  • 1 tbsp (heaping) chocolate chips
  1. Melt butter in a ramekin or mug. (It takes about 30 seconds in my microwave.)
  2. Stir the sugar into the melted butter until well mixed. (This is the important step that impacts the texture.)
  3. Mix in stevia, baking soda, and almond flour.
  4. Stir in chocolate chips.
  5. Microwave for 45-60 seconds. (It takes 60 seconds in my microwave.)
  6. The hardest part... let sit for about a minute before enjoying!

This recipe has been shared on Diet, Dessert and Dogs' Wellness Weekend, Allergy Free Alaska's Whole Food Fridays, Vegetarian Mamma's Gluten Free Fridays, and The Daily Dietribe's 5-Ingredient Mondays.

Wednesday, January 2, 2013

Hello 2013!

Welcome to 2013! I hope everyone enjoyed their holidays and was able to spend time with family and friends. I hosted a lovely Christmas dinner that was all gluten free. One of my aunts is also gluten free, so we both enjoyed being able to eat everything!

My oldest sister and I made all the food, including a crown roast of pork with gluten free stuffing and gravy. We also had creamed pearl onions (made with goat's butter and milk), farmer's salad (a layered salad), and King's Arms Tavern (Williamsburg, VA) Sweet Potato Casserole, all of which are holiday staples in my family. We had cherry pie, and a new recipe that my oldest sister wanted to try, cranberry meringue pie. Whipped cream and whipped coconut cream rounded out the menu. The food was delicious and the entire day was lovely.

I gave up on making new year's resolutions years ago. I have always failed at them so I've decided to not even try anymore. That being said, after all the parties of the season, I am feeling a bit weighed down and eating simply and whole always makes me feel better. This is a great recipe if you're feeling the same way. It is something my gluten free aunt made over the summer while we were visiting and we've eaten it several times since then. This dish is simple, filling, and yummy. And, it saves for several days (although my aunt warned me to not save it with the sunflower seeds on it.)

Kale Salad
Serves 4
  • 1 bunch of kale
  • juice from 1/2 lemon
  • 1/2 avocado, rough chopped
  • salt
  • pepper
  • 1 c raw brown rice, cooked
  • sunflower seeds, whole or ground
  1. Remove the kale stems and cut into 1/2" strips.
  2. Massage the kale with avocado and lemon juice with your hands until the kale has broken down, approximately 3 to 4 minutes.
  3. Season with salt and pepper to taste.
  4. Serve over brown rice with sunflower seeds on top.
This recipe was shared on Diet, Dessert and Dogs' Wellness Weekend, Vegetarian Mamma's Gluten Free Fridays, and Allergy Free Alaska's Whole Food Fridays!


Saturday, December 22, 2012

Friends, Pasta, and Veggies

I don't have many friends, but I'm very close to the ones I do have. What's funny is that we'll go months without talking with each other, except for the occasional comments on Facebook, but when we do see each other it feels like we haven't missed any time. Most importantly is that we're always there for each other. There isn't a thing one of us wouldn't do for the other. I love that! I feel so blessed to have them.

For the past nine years we've gotten together for the new year celebration. We gather at someone's house and spend a few nights there. In the early years we would just hang out. Now there are lots of kids so we spend time entertaining them. But, it's an experience I wouldn't trade. I wouldn't want to spend New Year's Eve with anyone else.

The celebration will likely be at my house this year (extenuating circumstances have made it so that we don't know for certain yet.) I'll probably do a fancy dinner and an easy dinner. This recipe for pasta with veggies may be the easy one! This is a standard recipe for our house because it's easy, delicious, and healthy!

Somebody likes to steal raw zucchini off the cutting board!
Pasta with Veggies
Served 4

  • olive oil
  • 1 onion, sliced
  • 1 zucchini, sliced (2 if small)
  • 1 clove garlic, minced
  • 1 pint cherry or grape tomatoes (multi-color ones are prettiest!), sliced in half
  • spinach, chopped (about 2 big handfuls)
  • basil
  • oregano
  • salt
  • pepper
  • goat cheese (optional)
  • pasta


  1. Start water for pasta. Cook pasta per the package directions. The veggies will typically be done around the same time as my pasta (which takes 10 minutes.)
  2. Cook onions and zucchini in oil over medium heat. (I put the onions in the pan and get them going while I cut the zucchini.)
  3. Once the onions and zucchini have started to soften, add garlic and stir for about 30 seconds, then add tomatoes and cook until soft and some liquid has released. I usually add a few tablespoons of pasta water to the veggies, as the starch in the water gives the veggies a creamier feel.
  4. Add the spinach and let it wilt.
  5. Add basil, oregano, salt, and pepper to the veggies.
  6. Serve the veggies over the pasta and sprinkle goat cheese on top.
  7. This can also be served over spaghetti squash instead of pasta; that's what I've been doing lately since I am temporarily grain free.


This recipe was shared on Diet, Dessert and Dogs Wellness Weekend, Vegetarian Mamma's Gluten Free Friday, and Allergy Free Alaska's Whole Food Fridays.

Thursday, November 15, 2012

Making Salads Fun, or How I Got My Spring (Rolls) On

There are very few women where I work as the construction industry is still a male-dominated field. We currently have two female engineers, and three women in the "front office" (admin, marketing, etc.) out of 22 employees. I was the lone female engineer for many years until recently.

Because there were so few women, we used to have "ladies' luncheons". For a while we did it once a month, and then it tapered off to just a few times a year. The person who spearheaded them, we'll call her AD, has left for new endeavors so I don't know if we'll have any more. We would always pick a theme and everyone would bring in a portion of the meal. When I went gluten and cow free every item conformed to my new eating plan (not a diet) and that was pretty awesome. We had a woman who was vegan for a while, so we did vegan luncheons a few times.

AD's mom is Vietnamese and so she grew up eating, and making, Vietnamese food. I had bought a package of spring roll wrappers, which I knew AD knew how to use, so we decided on spring rolls for the last ladies' luncheon we had. AD showed us the ropes for re-hydrating the wraps and filling and rolling them.

I enjoyed the spring rolls so much that I make them at home quite often. I do not make authentic spring rolls, but rather, something I call a "salad spring roll" which is basically whatever I have around, wrapped up. It's far more fun than plain salads!


Salad Spring Rolls
  • spring roll wrappers
  • rice vermicelli (authentic, according to AD) or bean threads (what I use because that's what my grocery store had)
  • greens of some sort, typically spinach
  • something sweet (mango, pear, apple), sliced in thin strips
  • something crunchy (cucumber, apple, red pepper), sliced in thin strips
  • shallow plate filled with water (I use a pie plate)
  • dipping sauce (optional) - I use this one, although salad dressing would also work!
  1. Cook the noodles according to the package directions and set aside.
  2. Dip the wrapper in the water so that it is wet. You don't want to put it in the water and saturate it. Let the excess water drip off and move it to your work surface. I like to use a wood cutting board. The wrapper will still be stiff, but will soften over the next minute.
  3. Once the wrapper starts to become pliable, pile the filling near one edge. By the time you've put your filling in, the wrapper should be completely pliable.
  4. Roll the edge over the filling. Then fold in the sides and continue to roll.
The filling for the spring rolls in these photos is spinach, pear, apple, red pepper, and bean threads.

This recipe was shared on Diet, Dessert, and Dog's Wellness Weekend, Gluten Free Fridays, Allergy Free Alaska's Whole Food Fridays, and The Daily Dietribe's 5-Ingredient Mondays.

Products I use
Re-hydrating the wrapper
Dip
Don't saturate!
Let the excess drip off
Filling and rolling
Pile filling near edge
Roll edge over filling, fold in sides
Continue rolling!

Thursday, November 8, 2012

Man, am I beet, errrr, beat...

(I've added two gadgets to my blog. One is a "Follow by email", and another is a "Follow me on Pinterest". Both are located in the sidebar to the right.)

What a week it's been! Not many things have gone according to plan, including my bed time. I cannot wait for the weekend.

In my last post I promised that I would soon have a post NOT about squash. This is it! This recipe for beet salad is amazing and easy. It has become even easier now for me...

My husband did the grocery shopping a few weeks ago. The list said to buy 3-4 beets, and he did. But one of the beets was the largest beet I have ever seen! It was the size of 3-4 beets. (Unfortunately, I forgot to take a picture.) Knowing that we would not eat that many beets before they went soft, I went ahead and cooked them all and tried freezing them. Much to my surprise, they defrost beautifully, which speeds up making this salad!

This recipe calls for pre-cooked beets. I've accomplished this a few ways over the years. Until recently, I usually steamed them in the microwave, per the method described in Joy of Cooking. Sometimes I'd just buy the steamed beets from the refrigerator section of Trader Joe's. Now I use my pressure cooker, which will likely be the subject of one of my kitchen gadget posts :-)


As an aside, my 2.5 year old son LOVES beet salad. He does not want a salad unless it has beets in it.

Beet Salad
Serves 4

  • olive oil
  • 1 small onion, sliced
  • 2-3 cooked beets, sliced
  • 1-2 tomatoes, depending on size
  • 1 tbsp balsamic vinegar
  • salt and pepper to taste
  • spinach, fresh
  • fresh herbs (optional), my favorite are mint, chives, and basil
  • goat cheese (optional)
  • pumpkin seeds (optional)

  1. Saute onion in olive oil over medium heat. I use a little more oil than I normally would as this becomes the dressing.
  2. Once the onions are sauteed, add in the beets, tomato, balsamic vinegar, and salt and pepper. Cook on low until everything is warm, usually about 5 minutes.
  3. Serve beet mixture over spinach. Top with fresh herbs, goat cheese, and pumpkin seeds.
This recipe was shared on Diet, Dessert, and Dog's Wellness Weekend, Gluten Free Fridays, and Allergy Free Alaska's Whole Food Fridays.