Monday, June 17, 2013

The Week Ahead... 6/17/13

What a weekend! We had my son's 3rd birthday party on Saturday and Father's Day on Sunday. The birthday party was construction-themed, fitting for my little "Engineer Junior". I hope to do a post about all the food later this week.  Meanwhile, here's what's on deck for this week.


Menu for the Week of June 17th

Monday: neighbor's graduation party
Tuesday: Make-ahead Layered Salad using leftover pork tenderloin
Wednesday: grilled veggies
Thursday: salad with grilled chicken
Friday: pizza
Saturday: sausage and veggies

Sunday, June 9, 2013

My Thoughts on Laundry and The Week Ahead... 6/10/13

Laundry is the gift that keeps on giving. Problem is, it's a gift I (and most others I know) don't want. Wouldn't it be great if laundry just did itself, particularly the folding part? We are so bad about folding laundry that we have four laundry baskets and an expandable "back-up" basket. I know...pathetic.


Menu for the Week of June 10, 2013

Monday: rice & beans, tomato
Thursday: beet salad
Friday: ?

Friday, June 7, 2013

Grilled Eggplant Stacks


In my last post I noted that I'm trying to grill more as it get warmer. Although, with Tropical Storm Andrea swinging past close enough to make it a yucky, rainy day today, I think I'll skip on tonight's planned grilling session.

This past Tuesday was gorgeous: mid-70s and dry! My son and I played on the deck while I grilled dinner and then we ate on the deck. My Girl Scout troop meeting was even held on the deck! We had eggplant stacks and they were amazing. You can't go wrong with prosciutto and fresh, smoked mozzarella cheese.

Some people would argue that anything with eggplant is wrong, but I think it's an acquired taste. I started out with a variety called graffiti that I get at our farm market. The skin seems to be thinner than some other varieties. I have since graduated to normal, grocery store varieties, such as these pictured here. The first key to preparing eggplant is to salt it and let it sit for about 20 minutes. This removes some of the moisture and makes it less rubbery when you cook it. I press kosher salt into both sides of each slice and place it in a colander over the sink. Make certain to rinse each piece before cooking!


I top each stack with a red pepper spread, which I cheat and purchase from Trader Joe's. I use it on so many different things from sweet potato to fried egg sandwiches to this recipe. My father-in-law enjoys it on ham or turkey sandwiches.


Grilled Eggplant Stacks
  • eggplant, sliced 1/4" thick
  • course kosher salt
  • olive oil (I use my Misto for this recipe)
  • smoked mozzarella, sliced 1/4" thick
  • prosciutto, slice each piece in half to fit eggplant
  • roasted red pepper spread
  1. Salt eggplant as described above. Preheat grill with all burners on high.
  2. Rinse and dry eggplant and spray or brush on olive oil. Place on grill over medium heat. (I place the food over my two center burners, which are turned off. The two outer burners are on medium-high heat.) Grill for about 5 minutes or until you get good grill marks and the eggplant has softened some.
  3. Flip eggplant over and place a piece of prosciutto and mozzarella on each eggplant slice. Grill for about 5 minutes more.
  4. Remove from grill, top with red pepper spread, and serve!


This recipe has been shared on Vegetarian Mamma's Gluten Free Fridays and Allergy Free Alaska's Whole Food Fridays.


Tuesday, June 4, 2013

The Week Ahead... 6/3/2013

Now that the summer heat is upon us, I'm turning to grilling a bit more to avoid the oven and adding heat to the house. This does require me to re-tool my meal planning, though, and find new, grill-able standards.


Menu for the Week of June 3, 2013

Monday: leftover rice and beans
Tuesday: grilled eggplant with prosciutto, smoked mozzarella, and roasted red pepper sauce
Wednesday: baked beans with chicken sausage and chard
Thursday: leftovers
Friday: grilled bison steak, grilled veggies, potato salad

Friday, May 31, 2013

Sweet Potato Sweetie Packs (for campfire, grill, or oven)


I love sweet potatoes. They are, hands down, one of my most favorite foods. I will even eat them for breakfast. I could go on Bubba-style (think Forrest Gump) about the many ways I eat them, but I'll spare you!

Last week I was considering food my three year old would likely eat for our camping trip and arrived at an old favorite: grilled ham steak, pineapples, and yams. My grocery store doesn't sell a lot of canned vegetables, which overall is a good thing, but annoying when you want canned yams. Then I remembered that I had two large sweet potatoes in the pantry and also remembered how good my last batch of grilled sweet potatoes was... this would mean that I would not have to go to a second grocery score... score!

I used the same method as before and they tasted AMAZING! They work on the campfire, grill, or in the oven. When we camp I prepare the pack before we leave and put it in a gallon zip bag in the cooler; that way all I have to do is throw it on the coals.


Sweet Potato Sweetie Packs
  • sweet potatoes, sliced (however many you need for your group) - I used two HUGE ones
  • butter (I use Earth Balance spread) - I used about 2 Tbsp.
  • honey (coconut palm sugar or sweetener of choice if vegan) - I used about 1 Tbsp.
  • cinnamon - I used about 1/2 tsp.
  • heavy duty aluminum foil (don't even think about skimping on this!)
  1. Set out a large piece of heavy duty aluminum foil. For two huge sweet potatoes I used a piece that was about 2' long. I also use the wider (18") heavy duty aluminum foil for foil packets.
  2. Smear butter on the aluminum foil, where the potatoes will go.
  3. Place half the potatoes on the foil. Drizzle honey over potatoes, scatter a few pats of butter, and shake on some cinnamon.
  4. Add the remaining potatoes on top.
  5. Gather the long sides of the foil and roll to close. Roll in each short side to form a packet. If I'm camping I put this packet in another sheet of foil to create a second packet around the first.
  6. Cook and enjoy!
    • Campfire: Cook right on top of hot coals for about 40 minutes, flipping and turning about every 10 minutes.
    • Grill: Grill over hot, indirect heat for about 25 minutes.
    • Oven: I've never done it, but I would cook it in a 400°F oven for about 30 minutes.

Mmmm... butter AND honey AND cinnamon!

On the grill (along with a chicken)!

Yummy perfection!

This recipe has been shared on Diet, Dessert, and Dogs' Wellness Weekend, Vegetarian Mamma's Gluten Free Fridays, and Allergy Free Alaska's Whole Food Fridays.

Sunday, May 19, 2013

The Week Ahead... 5/20/2013

It's yet another crazy week. I have a few evening meetings, my mother is having surgery on Thursday, and we leave for a camping trip with friends on Saturday morning, which is why I already know what we're eating next weekend.

We are going to the same campground the moms went to last fall. It will be the same moms, along with their families, as well as another family. I believe the total count is 10 adults and 9 kids, so it should be tons of fun. If all goes well with the food I'll be blogging on the trip later.


Menu for the Week of May 20th

Monday: Cuban-style black beans (source) with brown rice and tomatoes
Tuesday: Halloumi Quinoa (we didn't get to it last week)
Wednesday: Beet Salad
Thursday: leftovers
Friday: leftovers
Saturday: ham steak, grilled pineapple, foil sweet potatoes, s'mores!
Sunday: chicken foil packets with potato, bacon, apple, and onion, s'mores!

Sunday, May 12, 2013

Mother's Day and The Week Ahead... 5/13/2013

Sometimes I look at my son and am so surprised. The whole biology of it is awe-inspiring. I see so much of both my husband and myself in him, yet he is truly unique. And, I love him so much... more than I ever thought I could (yes, it's cliche, but true.)

It's funny the things you live for when you're a parent, like the fact that I hate leaving for work if he hasn't woken up yet because I don't get to hear, "bye, Mommy" as I walk out the door. Or, the way he runs to me every afternoon when I pick him up at daycare. Or, a request to go look at the tower cranes.

When I was pregnant we referred to my son as "little man". About a year after he was born I heard a song by Eddie From Ohio called "Hey Little Man" and it brought me tears. As a stereotypical engineer, I do have a hard time putting my thoughts and emotions into words, but this song nailed it for me. Here's my favorite line, and my hope for my son as well:

"May luck be by your side and the spirit be your guide,
And may you know the blessing, and may you know the joy,
And may you know the love of a true friend"

I wish a happy mother's day to all the moms out there!


Menu for the Week of May 13th
I'm out of town Tuesday and won't be back in time for dinner on Wednesday, but the fridge is stocked with leftovers!

Monday: Curried Spinach and Chickpeas with rice (sweet potato for me)

Tuesday: leftovers

Wednesday: leftovers

Thursday: hot dogs, baked beans, raw veggies

Friday: Halloumi Quinoa

Saturday: farmer's market find! (bison steaks, asparagus?????)

Monday, May 6, 2013

The Week Ahead... 5/6/13

This week's calendar is kind of crazy, so I tried to keep the menu rather simple. There was a request from a certain 3 year old for Sloppy Joes, even though we had them last week. Since they taste amazing and are easy, I agreed. We did not get to the beet salad last week, so I've moved it to this week since I already had the beets.

Tonight's dinner is another favorite of the 3 year old... Cuban-style Beans. The recipe is from my wonderful nutritionist and is super easy, but it does take a while to cook the beans. I made the beans last night and will throw some brown rice in the rice cooker when I get home. I'm not actually eating beans these days as I'm essentially on a paleo diet while my nutritionist gets my thyroid perked up. Beans are perfect for tonight, though, as I'm going to yoga and won't be eating dinner. I used to do yoga a lot but haven't done it in about 4 years. Swimming is making my muscles tighter, so I figured I needed to counteract that with yoga. And, the bonus with the beans is that I can freeze the leftovers and the family can eat them as I'll be away a few nights in the coming weeks. Hopefully that will make the next few weeks not as crazy as they look on the calendar!


Menu for the Week of May 6, 2013

Monday: Cuban-style Beans (source) and rice with avocado and tomato
  • prep salad
Tuesday: Make-ahead Layered Salad
  • prep Sloppy Joes and bake Scrumptious Sandwich Bread (source)
Wednesday: Sloppy Joes with raw veggies
  • cook beets
Thursday: Beet Salad
  • cut veggies and chicken
Friday: chicken stir fry over quinoa

Thursday, May 2, 2013

Swimming Update and Chard (or Kale) with Dates


I have to admit that I'm very proud of myself because I swam at least two times every week for the month of April. This is the best I've ever done with exercising and there are two reasons for my success: (1) I don't hate swimming so its not too much of a chore; (2) I'm trying to be a good role model for my son and show that regular exercise is just something we should incorporate into our lives. Clearly the latter reason is the most important and the one that really keeps my motivated to get up at 5 AM and get in the pool!

I'm definitely getting stronger and gaining stamina. I'm swimming about a 1/2 mile in 30 minutes. My abs, inner thighs, and arms are getting stronger. I just feel all around better. So, yay me!


Chard (or Kale) with Dates
  • 1 tsp olive oil
  • 1 shallot, chopped
  • 1 bunch chard or kale, washed, de-stemmed, and roughly chopped (I prefer chard)
  • 4 dates, chopped
  • salt and pepper
  1. Heat olive oil in a skillet. I use a 12" skillet.
  2. Sauté shallot until translucent.
  3. Add chard or kale and stir occasionally until beginning to wilt.
  4. Add in dates and stir occasionally until the greens have wilted.
  5. Finish with salt and pepper, as needed.


This recipe has been shared on Vegetarian Mamma's Gluten Free Fridays, Diet, Dessert and Dogs' Wellness Weekend, and Allergy Free Alaska's Whole Food Fridays.

Sunday, April 28, 2013

The Week Ahead... 4/29/2013

Menu for the Week of April 29th

Monday:  Curried Spinach and Chickpeas with rice (sweet potato for me)
  • prep quinoa gratin
Tuesday:  quinoa gratin
  • prep Sloppy Joes
Wednesday:  Sloppy Joes, raw veggies
  • prep beets
Thursday:  Beet Salad

Friday:  Kale Salad over quinoa

Thursday, April 18, 2013

Mister Rogers and Broccoli Apple Slaw


Between Boston and West, Texas there have been a lot of prayers lifted to those in need. There have been a lot of positive things said on social media, many accredited to Mister Rogers.  The quote I've seen the most is, "When I was a boy and would see scary things on the news, my mother would say to me, 'Look for the helpers. You will always find people who are helping.'" I find it interesting that, even after his death, Mister Rogers can help children and adults alike deal with our feelings. I'm glad to part of the Mister Rogers generation.

***

This recipe was inspired by a kohlrabi-apple slaw in Nourishing Meals. My grocery store did not have kohlrabi, so I used broccoli. I've changed the flavor profile of the dressing to accommodate the broccoli and dried cranberries.


Broccoli Apple Slaw
This holds for a few days in the refrigerator.
  • 2 crowns broccoli, cut into small pieces (I do this ahead of time)
  • 2 apples, cut into small pieces (I like Fiji)
  • ~1/4 c dried cranberries
Dressing (can be made ahead of time)
  • 6 oz plain yogurt (any type - I use goat)
  • 1 tbsp honey (or agave if vegan)
  • 1 tbsp apple cider vinegar
  • 1 tsp orange juice
  • 1/4 tsp ground ginger
  • 1/4 tsp salt
  1. In a small bowl, mix together all of the dressing ingredients. Set aside.
  2. Place broccoli, apples, and dried cranberries in a bowl.
  3. Pour dressing over slaw and stir. It's best if you let it sit for at least 10 minutes before serving.

This recipe has been shared on Diet, Dessert and Dogs' Wellness Weekend, Vegetarian Mamma's Gluten Free Fridays, Allergy Free Alaska's Whole Food Fridays, and The Daily Dietribe's 5-Ingredient Mondays.

Sunday, April 14, 2013

The Week Ahead... 4/14/2013


What an amazing weekend! We had lovely weather and got a lot accomplished.

We were home tonight instead of at my mom's for dinner. The pork chops were amazing; my husband declared them company-worthy!

Menu for the Week of April 14th

Sunday: Dijon and Honey Pork Chops, kale with dates
  • prep salad
Monday: Make-ahead Layered Salad
  • soak quinoa
Tuesday: Halloumi Quinoa
  • cut potatoes
Wednesday: Cranberry Orange Chicken, Roasted Potatoes, and pan-roasted brocolli (I typically make this with roasted green beans but the store was out of them.)
  • "rice" the cauliflower
  • prep the dressing
Thursday: Thai-Inspired Mango & Avocado Salad with Cilantro "Rice", from the May/June 2013 Simply Gluten Free Magazine

Friday and Saturday: trip!

Wednesday, April 10, 2013

Happy Half Blog-Birthday and Make-ahead Layered Salad


I made my first Engineering Dinner post 6 months ago today! There have been 43 posts since then and over 5,000 page views. True to the blog name, I've shared mostly dinners but there have been two desserts and a smoothie. And, like most bloggers, my most popular post has been a dessert.

My uncle has always brought his Farmer's Salad to family dinners. It's delicious, but I never knew how easy it was until this past Christmas when I made it myself. You layer all these ingredients together the night before and let them meld into a fantastically flavored salad. I've made it for several get-togethers since then and recently realized that there's no reason why this has to be reserved for special events. What's better than a salad that you just have to toss when you get home?

So my description thus far may have cued a memory of a mayonnaise-y salad you've had in your past. Yes, there's mayonnaise in this, and yes, it's a fair amount. If you dislike mayonnaise all I can offer is that I've served this to several professed mayonnaise haters (my husband included) and they've all enjoyed the salad. I think that mayonnaise selection is key here. In my experience, the Spectrum Organics brand Olive Oil mayo is the key to enjoyment for non-mayo eaters.


Straying from tradition, I have engineered the flavors a little bit for this version, and the possibilities for other flavor options are endless. It's also a great way to use leftovers, as I did with the chicken! It will keep for lunch the next day, but not much further.


Make-ahead Layered Salad
Serves 4+
All measurements are approximate and some depend on the diameter of your bowl.
  • 1 head romaine lettuce, cut and washed
  • 1/2 lb spinach, torn into bite-sized amounts
  • 2 stalks celery, diced
  • 1/2 c frozen peas (do not defrost)
  • 4 slices bacon, cooked and chopped (omit if vegan, or substitute another protein)
  • ~1/3 c cooked chicken, chopped (omit if vegan, or substitute another protein)
  • ~1/4 c craisins
  • ~3/4 c cheese, shredded (I used goat gouda, but any kind will work)
  • ~1/2 c mayo (vegannaise or another substitute is acceptable)
  • ~1/4 c mustard (I used a stone ground dijon, but honey mustard would be excellent)
  1. Place lettuce and spinach in the bottom of a large bowl. (I used my large mixing bowl.) You may need to press down gently to compress them.
  2. Sprinkle celery over lettuce layer.
  3. Sprinkle peas over celery.
  4. Sprinkle bacon and chicken over peas, if using.
  5. Sprinkle craisins over meat.
  6. Sprinkle cheese over craisins. You want to cover the surface with cheese.
  7. Mix the mayo and mustard together in a bowl. Spread over cheese to completely cover all the way to the bowl. It's critical that this mixture covers everything to seal out air and moisture. Cover bowl and place in fridge overnight.
  8. Next day: I like to pull it out of the fridge about 30 minutes before I plan to serve it. Toss completely and serve.
Lettuce, spinach, celery, and peas
Added meats and craisins
Seal out moisture and air... seal in flavor!
Yum!
This recipe has been shared on Diet, Dessert and Dogs' Wellness Weekend, Vegetarian Mamma's Gluten Free Fridays, and Allergy Free Alaska's Whole Food Fridays.

Monday, April 8, 2013

The Week Ahead... 4/8/2013

Menu for the Week of April 8th

Monday: layered salad with bacon and chicken
  • prep veggies
Tuesday: hot dogs, baked beans, and raw veggies
  • prep broccoli
Wednesday: roasted squash, broccoli apple slaw

Thursday: Beet Salad

Friday: out

Saturday: pizza with this crust, strawberry chia fluff for dessert!

Thursday, April 4, 2013

Swimming, Magical Music, and Mashed Sweet Potatoes and Cauliflower


I know this is a bizarre title but it's what I'm thinking about. Please excuse the lack of segues.

****

As an update to last week's post, I have joined the YMCA! On Wednesday morning I got up at 5AM and was in the pool swimming laps at 5:30AM. It felt great! I'm planning on doing it again tomorrow morning.

****

Does anyone remember the song from the 80s called "We Belong"? It was performed by Pat Benatar, but written by one of my favorite groups, Lowen and Navarro. I bought their Broken Moon album after hearing them on NPR. I went to see them in concert a few times and purchased a few more albums. When my son was a few months old Lowen and Navarro's music became magical for our family as it would calm our fussy infant and get him to fall asleep. All of you former or currently sleep-deprived parents out there can certainly agree that this would be magical! My son continued to fall asleep to Lowen and Navarro until last year when he discovered Adele and Robbie Schaeffer, of Eddie From Ohio. His favorite music to fall asleep to now is Robbie Schaeffer's La La Love, which is an awesome song for a good cause, an organization called One Voice.

Getting back to Lowen and Navarro, they have some absolutely beautiful songs. One of my favorites is Crossing Over, from their album Pendulum. My favorite album is Live Radio, which is acoustic versions of some of their songs. Unfortunately, Eric Lowen passed away last year from ALS, but Dan Navarro is still performing. Their final album, Learning to Fall, is particularly poignant.

****

This recipe is something I threw together because my grocery store was lacking most of the veggies I was looking for, such as squash, parsnips, and turnips. So, I decided to try cauliflower because I'm starting to like it now that I know it's good roasted. It was a hit, even with the almost-3-year-old. And, it was easy! Who doesn't like that?


Mashed Sweet Potatoes and Cauliflower
The cauliflower can be cut and washed the night before. The sweet potato can be peeled, cut, and stored in water until ready to use.

  • 2-3 sweet potatoes, cut into 1/2"-3/4" cubes
  • cauliflower, 1/2 head, cut into florets
  • salt and pepper
  • nutmeg
  1. Cook sweet potatoes and cauliflower together. I pressure cook them for 4 minutes with 1/2 cup of water. Boiling or steaming would also work. Depending on your cooking method, you may need to drain cooking water.
  2. Mash them and season with salt, pepper, and nutmeg to taste. They will be somewhat lumpy.


This recipe has been shared on Diet, Dessert and Dogs' Wellness Weekend, Vegetarian Mamma's Gluten Free Fridays, Allergy Free Alaska's Whole Food Fridays, and The Daily Dietribe's 5-Ingredient Mondays.

Sunday, March 31, 2013

The Week Ahead... 4/1/13


Happy Easter to all who celebrate it! Just a quick menu post for today as I have 14 people for Easter dinner this afternoon.


Menu for the Week of April 1st
It's a busy week, so this is an easy menu!

Monday: leftover soup from the freezer, Salad Spring Rolls
  • prep Sloppy Joes
Tuesday: Sloppy Joes, mashed veggies

Wednesday: I have an early meeting so my husband and son will likely go to Chipotle

Thursday: leftovers

Friday: fried eggs, tater tots, wilted spinach

Thursday, March 28, 2013

Chocolate Feel-good Protein Smoothie


I've been trying to figure out a way to work more exercise into my life. Ok, to be honest, I should say that I've been trying to figure out a way to work exercise into my life. I can't really use the word more because I currently don't get any official exercise. Sure, there's running after a almost-3-year-old and an occasional walk, but those don't really count.

I've always enjoyed swimming but haven't taken lessons except for a week here and there at summer camp. To kick start a swimming habit I decided to take swimming lessons. I absolutely love it! I've learned so many new things in just 3 weeks and am already feeling better.

The downside to the lessons is that they're at 12:45 on Saturday afternoon which is hard because it's right around lunch time. I generally try to get a snack around 11:30 and then make a smoothie when I get home. This recipe is a smoothie I've been making for a while, but I keep improving on it and I love where it is now.

The two shining star ingredients are hemp seeds and cinnamon. I recently learned here that hemp seeds are very high in protein, have a complete amino acid profile, and are a sustainable crop! Cinnamon is a natural anti-inflammatory, among a host of other benefits, which is excellent for a person with autoimmune diseases.

One thing that I've discovered about smoothies is that yellow squash adds a creaminess without adding any flavor! I have a high-speed blender, so I'm not sure how well the yellow squash works in a regular blender.


Chocolate Feel-good Protein Smoothie

  • 1 c milk (I use either almond milk or coconut milk beverage in the carton)
  • 1 tbsp nut butter (I usually use almond or peanut)
  • 1 tbsp cocoa or carob powder
  • 1 banana
  • 1/2 small yellow squash (optional)
  • 1 tbsp hemp hearts
  • 1/4 - 1/2 tsp cinnamon
  1. Place all ingredients in a blender.
  2. Blend on high until smooth, about 45 to 60 seconds (in a high-speed blender).
UPDATE 4/6/13: a handful of spinach also hides well in this smoothie!

This recipe has been shared on Diet, Dessert and Dogs' Wellness Weekend, Vegetarian Mamma's Gluten Free Fridays, The Daily Dietribe's 5-Ingredient Mondays, and Allergy Free Alaska's Whole Food Fridays.


Sunday, March 24, 2013

Freezing Beans and The Week Ahead... 3/25/13

I used to buy canned beans but a few years ago I switched to preparing dried beans myself. I cook them in large batches and then freeze them. Beans defrost rather quickly so it's almost as convenient as canned beans, but you control the amount of salt. One might also argue that using dry beans is more environmentally friendly as you are reducing the shipping weight. I'm not sure if the carbon footprint of the dried beans is lower, but I like to believe it is.

I make 2 cups of dry beans in my pressure cooker and let them cool a bit. Then I put a ladle-full of the liquid in the bottom of a labeled quart-size freezer bag. (Note: Most ladles are 1/2 cup.)


Then I strain a few scoops of beans in a colander set over the pan, this way I retain more of the liquid. I then use the ladle to scoop measured volumes into the bag. From what I've read, most cans of beans have 1-1/2 cups of beans. After making these bags, though, I'm guessing a can of chickpeas is actually 1 cup.


Next, I add some more of the liquid and seal the bags. I spread them out flat and place them on a tray that fits nicely in the freezer.


Last, I pop them in the freezer and leave them on the tray until they're frozen flat.


I store all my beans upright in a freezer drawer.


Menu for the Week of March 25th

Monday: Curried Spinach and Chickpeas with rice (sweet potato for me)

Tuesday: leftovers
  • defrost soup
Wednesday: leftover soup from the freezer and Salad Spring Rolls
  • cook beets, defrost goat cheese
Thursday: Beet Salad
  • soak quinoa
Friday: Halloumi Quinoa (we didn't get to it last week)

Saturday: out

Sunday: hosting Easter dinner...

Sunday, March 17, 2013

The Week Ahead... 3/18/13

What a weekend! Most of my husband's cousins from one side came to our house and we talked and played games all night! There were 9 adults and my almost-three-year-old son. I made Cranberry-Orange Chicken for dinner with quinoa and a strawberry and spinach salad. We had ice cream sundaes with a grain-free blondie that I've been working on (still not right!). For breakfast I made baked french toast with bacon and Canadian bacon. The house still smells like bacon. It was such a lovely get-together and I hope we do it again soon!


Menu for the Week of March 18, 2013

Monday: Spinach Quinoa Socca Cakes, leftover spinach and strawberry salad

  • prep meatloaf and veggies

Tuesday: meatloaf, mashed veggies (cauliflower and sweet potatoes)

  • prep beans

Wednesday: Cuban beans (source), brown rice (sweet potato for me)

Thursday: leftover ham bean soup

  • soak quinoa

Friday: Halloumi Quinoa

Saturday: chicken, roasted veggies (beets, brussels sprouts, potatoes, cauliflower, onion, zucchini), quinoa, fruit pie (maybe!)

Sunday, March 10, 2013

The Week Ahead... 3/11/13

So I write my weekly menu every week and post it. However, the number of people who read this post is very minimal so I'd either like to improve it, or stop posting the menu. Please leave me a comment considering the following questions... Do you like seeing my weekly menus? Are they helpful? Do you find yourself considering them as you make your own menu? Would it be more helpful if they posted a different day than Sunday night? Is there something else you would like to see or know?


Menu for the Week of March 11, 2013

Monday: acorn squash, roasted cauliflower
  • prep socca cakes
Tuesday: Spinach Quinoa Socca Cakes, kale

Wednesday: Something from the freezer

Thursday: Hot dogs, baked beans, salad

Friday: Curried Spinach and Chickpeas with rice (sweet potato for me)

Thursday, March 7, 2013

Cranberry Orange Chicken, Roasted Potatoes, and Roasted Green Beans in Under 1 Hour

If you read my last post, yes, I did pass the exam for which I was studying!


I was inspired last week by Megan's post on her blog, Allergy Free Alaska, on what she feeds her children for dinner. One night she served baked chicken and it looked really good, and I realized that I had not made baked chicken in years (yes, years!) I combined chicken breasts with yummy roasted potatoes and roasted green beans. It was delicious and completed in one hour, start to finish.

I'm going to give the directions for staging the entire meal, but feel free to extract portions of the meal.

Cranberry Orange Chicken, Roasted Potatoes, and Roasted Green Beans in Under 1 Hour
Serves 4

  • potatoes, I used 1.5 lbs of red, washed and cut in half
  • olive oil
  • salt and pepper
  • 1 lb chicken breasts
  • 1/3 c orange juice
  • 1/4 c dried cranberries
  • 4 handfuls of green beans
  1. Preheat oven to 425°F.
  2. Place cut potatoes in a bowl and toss with olive oil until coated. Add salt and pepper and toss some more.
  3. Place potatoes on a cookie sheet, cut side down. Cover tightly with aluminum foil and put in oven and set timer for 20 minutes.
  4. Meanwhile, trim chicken of fat and place in pan (I use a glass pie plate). Pour orange juice over chicken and sprinkle with dried cranberries and salt and pepper.
  5. When the timer goes off, remove foil from potatoes and return to oven. Place chicken in the oven. Set timer for 10 minutes.
  6. Wash and trim green beans. I like to cut them in half, as well. Place in bowl and toss with olive oil, then salt and pepper.
  7. When the timer goes off, remove the potatoes from the oven and carefully turn each one over. (Leave the chicken in the oven.) You'll want to make certain that you don't leave some of the potato attached to the pan. I use a thin silicone spatula, but a metal one would also work well. Move the potatoes to one side of the pan to make room for the green beans on the same cookie sheet. Place green beans on cookie sheet. Set timer for 5 minutes.
  8. When the timer goes off, flip the green beans over (or just move them around a bit.) Set timer for 5 minutes.
  9. When the timer goes off check everything to see if it's done. The chicken should be at 165°F (mine took 5 more minutes.)
Timing Totals Summary
potatoes: 20 minutes covered, 10 minutes uncovered, flip, 10 more minutes
chicken: 20 to 25 minutes
green beans: 10 minutes, turning at midpoint

This recipe has been shared on Vegetarian Mamma's Gluten Free Fridays and Allergy Free Alaska's Whole Food Fridays.

Sunday, March 3, 2013

The Week Ahead... 3/4/2013

This is going to be quick tonight as I have to finish studying for an exam! It's (another) certification exam. My industry has fallen in love with certifications over the past few years. I suppose it's good overall, but it's really annoying on a personal level.


Menu for the Week of 4 March 2013

Monday: Spanish Quinoa (source)

  • prep Sloppy Joes, make bread, clean kale

Tuesday: Sloppy Joes, Kale with Cranberries

  • prep potatoes, grate cheese, defrost black beans

Wednesday: Cheeseburger Soup

  • prep Thursday's meal

Thursday: trial recipe with acorn squash

Friday: leftovers

  • defrost ham bone

Saturday: ham bean soup

Thursday, February 28, 2013

Reminders and Slow Cooker Sausage Bean "Stoup"


Ever have those days (okay, weeks even) where you can't remember a single thing? I've had many of those lately. The worst part is having to leave reminders to do something. For years we've had a system of leaving notes taped to the front door so we remember things on our way out. They've ranged from "lunch" to "crock pot". We've lately been using the same three over and over, so we've just kept the note and taped it to the backsplash when we didn't need it. The tape drives me nuts because it leaves a sticky residue on the door knob if you aren't careful. Enter the craft project!!


I'm pretty certain I had seen foam door knob hang tags, but I couldn't find them when I needed them, so I just bought regular foam paper and cut out hang tags. Then we decorated them with stickers. We learned the hard way that regular marker never dries on foam paper. You must use permanent markers.

The hang tags live in a kitchen drawer and when you need to remember something it gets hung on the door into the garage. In this case I taped a piece of paper to one to remind my husband to turn on the slow cooker before he left for work.


In the slow cooker was a recipe created by my friend, Karen. It's a great cold weather cross between a soup and a stew, or, stoup, as Rachael Ray calls them!


Slow Cooker Sausage Bean "Stoup"
I put this together the night before and put the insert in the refrigerator. My husband puts the insert in the slow cooker in the morning. The leftovers freeze quite well. It tastes better than it looks.

  • 1 c dried mixed beans (like a 9 bean soup mix)
  • 1 medium onion, chopped
  • 16 oz bag frozen chopped spinach
  • 4 sausages of choice, precooked, sliced 1/4" thick (I've used everything from italian to chicken and apple. Also feel free to leave this out if you're vegan, it will still be delicious!)
  • 1 qt stock of choice
  • 1 c squash puree, optional (I've been know to used canned pumpkin, but anything will work)
  • spices of choice (last time I used ground mustard, thyme, and parsley)
  • salt and pepper
  1. Put everything in the slow cooker and cook over low heat for 8 hours or more. (I usually cook it for 10 hours.)
  2. Serve by itself or over quinoa or another grain.

This recipe has been shared on Diet, Dessert and Dogs' Wellness Weekend, Vegetarian Mamma's Gluten Free Fridays, and Allergy Free Alaska's Whole Food Fridays.

Sunday, February 24, 2013

My Crazy Pantry and The Week Ahead... 2/25/2013

We were at a party on Friday night and we brought a cheese platter. Keeping in mind the name of my blog and the fact that I'm pretty food allergy aware, I had labeled all the various cheeses. Our friends made all sorts of comments about me being an engineer. Later, someone asked my husband about my pantry. So, I guess it's time for me to fess up... my pantry is insanely organized. All dry goods are stored in matching containers, complete with a label. Loose items, such as chips, nuts, and crackers, are in large bins grouped by GF or non and then type. Oils and vinegars are grouped on one side, canned goods, sorted by type, are on the other side. It's crazy, but it makes me happy!


Menu for the Week of February 25, 2013

Monday: trial casserole (I'm hoping to post the recipe soon)
  • prep chickpeas
Tuesday: Spanish Chickpeas and Sausage

Wednesday: Halloumi Quinoa

Thursday: soup from the freezer

Friday: baked chicken breasts, roasted potatoes, green beans (inspired by Megan's latest round-up)

Saturday: out

Thursday, February 21, 2013

Meatloaf

Meatloaf... One name, but so many variations. Bread crumbs, egg, oatmeal, combination? Sauce or dry?

I have a theory that you only ever like your mom's meatloaf. Although, I have slowly converted my husband to prefer my meatloaf, so I guess change is possible. I still adore my mom's meat loaf. It's great the first night, or reheated for leftovers, or as a meatloaf sandwich.

Growing up we always had it with baked potatoes and spinach (frozen) because they all cooked in the oven at the same temperature for about the same time. (My mom truly is a domestic goddess!) I typically serve it with baked potatoes and a veggie. I'm embarrassed to admit that I have a weakness for canned green beans, so that's usually what I serve with it.

If you don't adore your mom's meatloaf recipe, go ahead and give my mom's version a whirl!


My Mom's Meatloaf
I typically prep this the night before so I just put it in the oven once I get home.
  • 1 lb ground meat (I use bison)
  • 1 c rolled oats or quinoa flakes
  • 1 small onion, chopped
  • 1 egg
  • 8 oz tomato sauce (or 4 oz tomato sauce and 4 oz chili sauce)
  • salt and pepper
  1. Preheat oven to 350°F.
  2. Grease a loaf pan.
  3. Mix everything together and put in loaf pan (I use my hands.)
  4. Bake for 1 hour.

This recipe was shared on Vegetarian Mamma's Gluten Free Fridays and Allergy Free Alaska's Whole Food Fridays.

Monday, February 18, 2013

Gardening and The Week Ahead... 2/8/2013

I just spent a lovely weekend in Colonial Williamsburg. We were planning on being in the area on Saturday for a birthday party, so we decided to make a long weekend of it and invite my mother as well. Although it was cold, we enjoyed ourselves.

I purchased a book on organic gardening in the 18th century and can't wait to read it. I had two tomato plants in the ground last summer, and two in pots. They did surprisingly well and I'd like to plant more vegetables this year. My son also enjoyed the plants. One of the potted grape tomatoes was so popular with him that hardly anyone else got to taste them; he would eat them right off the vine. He still talks about growing tomatoes!

The Colonial Garden in Williamsburg had lots of cabbages and turnips growing, many using cloches. They also had lots of plants getting started in straw-insulated hot boxes. Below are some pictures from the garden.


Menu for the Week of February 18, 2013

Monday: leftovers

Tuesday: Curried Spinach and Chickpeas with rice (sweet potato for me)

Wednesday: scrambled eggs with tomato and wilted spinach, tater tots

Thursday: hot dogs, baked beans, salad

Friday: no cooking - friends house for dinner!

Saturday: who knows?

Thursday, February 14, 2013

Engineering Dessert: Nut Butterfingers

Reminder: Find my on Twitter (@EngDinner), Facebook (EngineeringDinner), and Pinterest (Engineering Dinner)

One of the best things about being an adult involved in Girl Scouts is that you meet some wonderful women! And, they span the decades in age and all bring various backgrounds and interests to the group. Amazing!

There's one woman in particular who is such a sweetheart and bleeds Girl Scout green! She used to volunteer as a Service Unit Manager, which is a person who oversees anywhere from 20 to 35 troops. She now is a paid Girl Scout employee. Anyway, we were at a meeting planning events for multiple service units and she brought the most amazing snack I had ever had (okay so I was pregnant at the time!) They were a peanut butter and oatmeal bar cookie base with chocolate and peanut butter on top. I immediately asked her for the recipe. The next time I saw her, not only did she have the recipe, but she had made a batch just for me! And, she was sharing a recipe that had been her mother's. The woman was probably around 60, so this is definitely a well-loved, tried-and-true recipe!

I've made them many times but have only dreamt about them since becoming gluten free. But in my desire to create another dessert for the blog I decided to try tackling them based on my current food philosophy. I was pretty close on the first try, the second try was even better, and now I'm declaring them just as amazing as the gluten-full, grain-full, refined-sugar-full, dairy-full version! (And, just for kicks, I omitted the egg.) I hope you enjoy them as much as I do!


Nut Butterfingers
The original recipe was called Peanut Butterfingers. My son is allergic to peanuts, and while he doesn't care for sweets, he does like to help me bake, so I use almond butter if he's helping. My husband actually prefers the almond version to the peanut version, but he's not a peanut butter and chocolate fiend. By the way, this makes a lovely half recipe in an 8"x8" pan.

Cookie Bar Base
  • 1/4 c Earth Balance
  • 1/2 c coconut palm sugar
  • 5 drops stevia (I used vanilla flavored)
  • 1 flax egg (1 Tbsp ground flax mixed with 3 Tbsp boiling water, let sit for 15 minutes)
  • 1/3 c nut butter (I've tried almond and peanut so far)
  • 1/4 c applesauce
  • 1/4 tsp salt
  • 1/2 tsp baking powder (watch out for corn starch if avoiding grains!)
  • 1 tsp vanilla extract
  • 1/2 c almond flour
  • 1/2 c chickpea flour
  • 1 c quinoa flakes

Topping
  • 6 oz chocolate chips (semi-sweet)
  • 1/2 c powdered sugar (can make your own using unrefined sugar)
  • 1/4 c nut butter
  • 2-4 Tbsp milk (I used almond)

  1. Preheat the over to 350°F. Grease a 13"x9" baking pan (I used glass.)
  2. In a mixer, cream together the butter, sugar, and stevia.
  3. Blend in the egg, nut butter, applesauce, salt, baking powder, and vanilla.
  4. Stir in the almond flour, chickpea flour, and quinoa flakes.
  5. Spread into the prepared pan and bake for 25 to 30 minutes.
  6. Sprinkle the chocolate chips on top as soon as it comes out of the oven. Let stand for 5 minutes to melt.
  7. Meanwhile, in a small bowl, stir together the powdered sugar, nut butter, and milk until smooth.
  8. Spread the melted chocolate chips evenly over cookie bar base.
  9. Drizzle the nut butter over the melted chocolate and pull a spatula through to mix the two toppings.


This recipe has been shared on Diet, Dessert and Dogs' Wellness Weekend, Vegetarian Mamma's Gluten Free Fridays, Allergy Free Alaska's Whole Food Fridays, and Simply Sugar and Gluten Free's Slightly Indulgent Tuesday.


Sunday, February 10, 2013

Happiness, Kids, and The Week Ahead... 2/11/13

I was listening to NPR's Morning Edition on Friday (like I do every morning) and they did a piece about happiness and how many countries have adopted some measurement of happiness as one of their published statistics. The interviewer was speaking with an economist who's been tracking happiness for a number of years. Many economists and psychologists have kept data for so long that they believe they can gauge a person's happiness by knowing some personal information. The third bit of personal info requested was if the interviewer had children. She did, which according to one economist meant that she was unhappy, but the other said that was debatable. When they said parents were unhappy my husband responded, "That's because we're always tired!"

How true! I rarely go to bed before 11 and I'm up at 5:30. Lets admit it, that is just not enough sleep for anyone. One of the main reasons I'm up so late is because I spend a fair amount of time preparing food for the next day and making my lunch. I'm not the most efficient person when it comes to keeping on track and staying focused on a task later in the evening. After thinking about this for a while I've decided that I need to start doing more of what my nutritionist calls "convertibles", when you re-engineer a meal as a different meal later that week. This is my first attempt, and it's not very creative but hopefully I'll get better.

Last week I had also started pre-packing snacks for the week. If I know I'm going to have hummus and chips in my lunch every day, why not package them out at the beginning of the week and save myself some time?

Now to return to the happiness and kids thing... Raising children (or a child, in my case) is incredibly difficult but incredibly rewarding! Cliche, I know, but it is the truth. One of the things I read in a parenting book that has helped me the most is knowing that my child's job is test. Push and push until I finally set a boundary. Try it again, with maybe a slightly different twist, and see where the boundary is now. That's how children learn. It's trying, but at the end of the day when you get a huge, tight hug and a kiss it no longer matters!

May the week ahead be filled with happiness, children or not!

(Find that NPR report here)

Menu for the Week of February 11, 2013

Sunday

  • prep chili

Monday: chili in the crockpot (didn't get to it last week)

  • prep broccoli and slaw dressing, cut and degunk squash

Tuesday: baked beans, roasted kabocha squash, broccoli and apple slaw

Wednesday: Cuban style beans from the freezer, and rice (sweet potato for me), avocado, tomato, cheese

  • prep cauliflower, degunk squash

Thursday: still trying to work up a recipe with acorn squash, cauliflower, and spinach (I had to do something different last week because the grocery store had neither acorn squash nor cauliflower)

Friday: leftover chili over baked potatoes

(Of course, I came home from my mom's tonight with leftover meatloaf and au gratin potatoes. I think it will mostly be used for lunches, but it may become a last minute substitute!)

Sunday, February 3, 2013

Gadgets... Pressure Cookers and The Week Ahead... 2/4/13

When I first changed my food philosophy to include a lot of beans I decided to switch to buying dry beans and cooking them myself instead of canned. I looked into pressure cookers at that time but didn't really see the benefit. Instead I bought a 3 quart sauce pan.

Then, I confess, I started watching QVC from time to time (my middle sister got me started), particularly the kitchen gadget shows. They kept having electric pressure cookers on and this caught my attention. One of the funnier lines was "this is not your mother's pressure cooker" meaning it was less likely to blow up, I think. I started thinking about pressure cookers again because I didn't really like watching the beans cook on the stove, but an electric pressure cooker was more set-it-and-forget-it.

Much research later and I purchased a 6 quart electric pressure cooker made by Cuisanart. Some people have problems with this model because it's high pressure is only 10 psi and I guess most are 15 psi, so cook times are longer than many recipes. However, it comes with an extensive recipe booklet and guide so I haven't run into any problems.

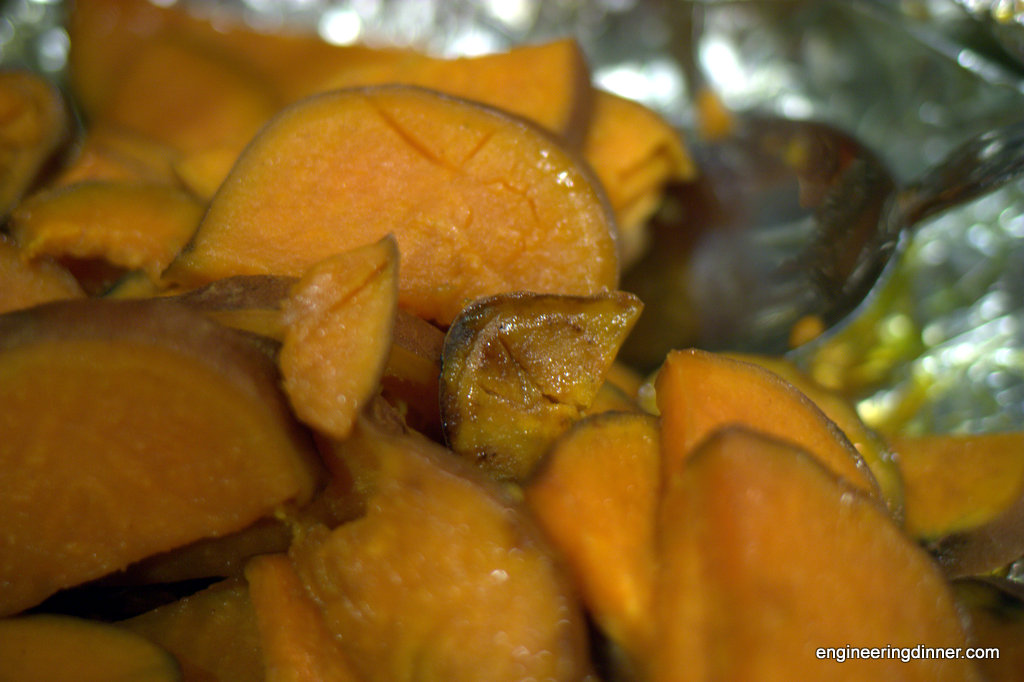
I have not cooked complete meals in it, but mainly use it for beans, beets, potatoes (for potato salad), squash for purees, and once for soup. I also cook rice and quinoa in it. I use it a fair amount (more than my husband expected me to, which is an ongoing joke for us regarding kitchen toys, uh, gadgets.)

So, does one need an electric pressure cooker? No, but it is nice to have. I do like the electric one because I set it and let it do its thing. I don't have to watch a gauge to get it up to pressure, nor do I have to maintain the pressure while cooking as you would with a stovetop model. I also have a gas range and I don't like to stray too far from the kitchen when it's on, but after a few uses of the pressure cooker I'll even leave the house while its running.

And, mine just beeped to let me know the beans for tomorrow night's dinner are done!


Menu for the Week of February 4, 2013

Sunday:
  • prep squash and white beans, clean kale
Monday: Butternut Squash, Kale, and White Bean Soup (using pressure cooker)
  • prep cauliflower, acorn squash, prep kidney beans
Tuesday: a little recipe I'm working up with acorn squash, cauliflower, spinach and who knows what else...
  • prep chili
Wednesday: chili in the crock pot

Thursday: leftovers
  • prep potatoes, meatballs
Friday: Kale Meatballs, Potato Salad

Saturday: ???? (too many potentials to plan, but if I'm cooking it's likely to be this)

Thursday, January 31, 2013

Blogging Thoughts and Potato Salad

I've now been blogging for 3.5 months and I'm thoroughly enjoying it! I've been working on my photography and feel I'm improving (disclaimer: pictures on this post were taken a while ago!) As part of improving my photography, I was shopping with my mother and picked up a variety of plates and textured backgrounds. My <unbiased> mother informed me that she thought my photos were fine, but I thought they needed improvement in order to make a successful blog. Then she asked why I needed a successful blog. Wow! What a question! Umm... I guess because I'm passionate about food and cooking and would like to share with others. (Eventually, a cookbook deal or sponsorship would be nice, too.)

My current food philosophy has changed my life dramatically. I used to have stiff joints every morning. Now stiff joints are a rare occurrence. It's amazing to me that a change so simple as the food you eat can make such a dramatic difference in your life. But, I guess that's why they say you are what you eat.

So, what am I getting out of this blog? My writing has improved. I'm beating the stereotype about engineers and writing! Maybe all engineers should blog...

I'm also pretty excited about having had almost 2,500 hits (granted, over 500 are from this post.)

What does the future hold? More posts, more recipes, more gadget reviews, more menus, and more Engineering Desserts. I've also started a Facebook page and Twitter account. (Links to like/follow are on the right.)

Today I'm sharing my potato salad recipe. My mom used to make a potato salad that marinated in a vinaigrette first and then the mayo was added. We would sneak pieces of potato before she put the mayo in, so she stopped adding the mayo altogether! There are a variety of ways to make it by changing the vinaigrette, but this version is my favorite.


Potato Salad
Serves 4

  • 4 to 6 large new potatoes (or other type)
  • 3 Tbsp extra virgin olive oil
  • 2 Tbsp brown rice vinegar
  • 2 tsp mustard
  • 1/2 tsp maple syrup
  • 1/4 tsp sage
  • salt and pepper to taste
  1. Slice potatoes into bite sizes pieces. I will typically cut into quarters lengthwise and then 1/4" slices.
  2. Cook potatoes in boiling water until easily pierced with a fork. Alternately, cook potatoes in a pressure cooker. It takes about 3 minutes in mine at 10 psi.
  3. While the potatoes are cooking, mix the remaining ingredients together to form a vinaigrette. I use a jar so I can shake it, but a bowl and whisk work, too.
  4. Drain potatoes in a colander.
  5. Transfer potatoes to a bowl and stir in vinaigrette while the potatoes are still warm. You won't necessarily need all the vinaigrette, based on the number of potatoes.
  6. Serve warm, room temperature, or cold.
Note: The potatoes can be cut the night before. Place sliced potatoes in a container and fill with water to cover the potatoes. Store in the refrigerator. Drain and cook. The vinaigrette can also be made the night before, just bring to room temperature and give it a good shake before dressing the potatoes.


This recipe has been shared on Diet, Dessert and Dogs' Wellness Weekend, and Vegetarian Mamma's Gluten Free Fridays.

Thursday, January 24, 2013

Cold Weather = Comfort Food

Wow has it been cold here! The high has been 20°F the last few days (yes, I realize that this is significantly warmer than other parts of the country!) I have been persistently cold which makes me want comfort food: soup, sloppy joes, hot chocolate...

Food was an integral part of my upbringing. My mom is a great cook and she prepared quality, homemade meals almost every night (though I totally understand now why she kept fish sticks and tater tots in the freezer for those nights!) All three of us girls were encouraged to help with meal prep and she even had us each make dinner one night a week for a while. She would help us pick a recipe and figure out what needed to go on the grocery list -- a good skill to learn (thanks, Mom!)

By the time I was in my last three years of high school I made some of the weeknight meals. My parents had their own business and would get home just in time for dinner, my oldest sister was away at college, and my middle sister was going to college locally and rarely made it home in time for dinner. I enjoyed cooking, though, so it wasn't really a chore.

Since I enjoyed cooking I decided to focus on it for my Girl Scout Gold Award project. I created a cookbook for a local food pantry. The cookbook was based on easy, inexpensive meals that used a lot of the staple ingredients at the food pantry. I sent letters out to family and friends asking for recipes and put together a decent cookbook.  I still have a copy of it and use it mainly for the comfort food recipes.

My comfort foods growing up were beef stew, macaroni and cheese, meatloaf, sloppy joes, and something we called goulash. Today I only really make the meatloaf and sloppy joes; a result of my changed food "philosophy" (I refuse to call it a diet.) It will be interesting to hear my son's comfort food selections years from now; if I had to guess they're Cuban-style black beans with brown rice, Curried Spinach and Chickpeas with basmati rice, and sloppy joes.

My family's sloppy joe recipe is delicious and easy. You can have it on the table in 20 to 25 minutes, or make it the night before and reheat it! I have no clue where it came from, but is likely a tweaked version from one of my mom's older cookbooks. Enjoy!

Sloppy Joes
serves 4
  • olive oil
  • 1 small onion, diced
  • 1 lb ground beef, ground turkey, ground bison, or Quorn grounds
  • 1/2 c ketchup
  • 1/2 c chili sauce (Organicville makes a HFCS-free version)
  • 2 Tbsp sucanat or palm sugar (the original recipe called for brown sugar)
  • 1 Tbsp vinegar (we've always used white, but others would be good)
  • bread of choice (Scrumptious Sandwich Bread from Alana Amsterdam's The Gluten-Free Almond Flour Cookbook for me, potato rolls for everyone else)
  1. Saute onion in oil over medium until translucent.
  2. (Skip this step if using Quorn or another vegan meat substitute.) Add meat to pan and brown. Drain excess liquid.
  3. Meanwhile, mix the remaining ingredients for the sauce. (I like to use a 2 c liquid measuring cup and measure the ketchup and chili sauce directly in it, then add the other stuff.)
  4. Mix the sauce into the meat mixture. (If using a vegan substitute, pour the sauce in with the onions and then add the meat substitute.)
  5. Let it simmer for about 5 minutes then serve over your choice of bread. I typically reduce the heat to medium-low to keep it at a simmer.


This recipe has been shared on Vegetarian Mamma's Gluten Free Fridays and The Daily Dietribe's 5 Ingredient Mondays.